Baby Mary is Christened

As promised, a few photos of baby Mary in her christening gown. It looks a bit big, but my mother-in-law said that with the sash tied it fit just about right =)

Here’s precious baby Mary in her gown next to her mom’s first Holy Communion dress, from which it was made. Every bit of fabric and lace was from the original dress, except for the trim at the hem of the new gown, which came from the veil she wore with the Communion dress.

Both grandmothers and christening day.


Have a creative day!

-J

Sewing for my first niece, Mary

I had the incredible privilege to welcome my first niece recently, and I wanted to give her an extra-special gift. So, with my mother-in-law’s help, I was given my sister-in-law’s first Holy Communion dress to use to make a christening gown for baby Mary. It was a full-on 90’s acetate wonder, and I wish I had taken a few more photos during the process, but what I have is below. I also worked with fleece for the first time to make a couple jackets for that chilly Irish weather. Everything pictured here was ready for her baby shower back in September. Baby Mary arrived late January, as expected. Sister-in-law and niece are doing great, and she was baptized on March 4th wearing the dress. Photos of that to come, with her mother’s permission =)

Enjoy!


I started with a commercial pattern for a simple baby dress, altered the pleats out so that I had a basic dress with high waistline, and tried it out in broadcloth. Unfortunately, I had miscalculated something and the neckline was waaaaaay too wide, so I had to tweak that. Always do a muslin first! 😉

IMAG0846IMAG0848

This is the beauty I had to work with: 100% acetate, straight from the 90’s. It has a jewel neckline, back button placket, lace bodice with lace applique over the top chest, puffy sleeves, a basque waist with plastic pearl and lace peplum detailing, and a generous, creased hem.

IMAG0856

the waist lace and pearl detailIMAG0850

The lace applique over the acetate-underlined lace bodiceIMAG0851

To deconstruct the dress, I carefully removed those gigantic puffy sleeves at their seams and worked the skirt free of the waist seam and plastic pearl trim. All of those seams were sewn and serged separately and it took me a really long time just to get all the seams apart without shredding the edges of the fabric. Somewhere in there I was able to carefully remove the beaded lace applique from the bodice without doing any damage to the lace fabric underneath.

I had to do a little touching up with Shout on the hemline once I let it out, and with bleach on the applique, but it turned out pretty well.

My plan was to work WITH the dress as much as possible. Interestingly, the jewel neckline wasn’t that much bigger than the baby dress pattern, so I decided to preserve the neckline binding, back button placket and shoulder seams as-is and cut the bodice out of the dress in one piece.

Here you can see how I cut the entire bodice of the new dress out wile preserving the shoulder and neckline seams as well as the back buttons. Best. Idea. EVER. It saved a TON of work. I carefully pinned the lace so that it wouldn’t move while working with it.

IMAG0872


You can see the lace “peplum”, the beaded trim, the intact sashes, the skirt, and the bodice appliques here. I wish I had more photos of the middle portion, but I just forgot to keep up.

IMAG0873

You would think a little girl’s dress would be plenty long for a baby dress, but I had envisioned a flowing gown much longer than the baby, so I was faced with a choice: cut the top of the skirt straight across or fill in the triangle cutout created by the basque-shaped waist. I opted for the latter to preserve as much length as possible. I didn’t really do it quite right, or at least I think I could have done it better, but I decided to put the beaded appliques right over that part to hide the patch of extra fabric. That was interesting because the skirt was gathered at the waist, and the appliques overlapped both the flat bodice and the gathered skirt, I had to strategically hand-stitch every nook and cranny of the applique down to those gathers. That was the worst part of the entire project!

For the sleeves, I used the lace peplums. They were originally a length of rectangular lace that had been tapered in to complement the basque waist. So, I copied the tapered end of the lace onto the rectangular end at a length that would create a ruffle/cap sleeve.

The lace at the hem came from her veil, and I ended up using the plastic pearls as trim just below the neckline binding. It was the perfect length =)

Here’s the finished product at the baby shower with a photo of the mom-to-be wearing the original dress at her first Holy Communion. IMG_2131_2

full-length close-up

IMG-20170918-WA0002

From the back you can see the preserved buttons and buttonholes, which saved me a TON of time. You can also see that I inserted the original sashes into the side seams of the new dress.

IMG-20170918-WA0006

A close-up of the bodice with pearl trim, peplum-turned-flutter sleeves, and the chest appliques now at the center waistline.

IMG-20170918-WA0005

And those crazy puffy sleeves???? Yep! There was enough fabric for bloomers!

IMG-20170918-WA0001

Being in a country with overall cool and dreary weather, I decided to also make a couple of fleece jackets. This is the smallest size of one commercial pattern and it’s big on her now even at 1 month old. I was really proud of myself for getting the ladybugs to all face the way I wanted with so little fabric (less than a yard remnant- much less than a yard if I remember correctly!)

IMG-20170918-WA0003

This is the smallest size of a different pattern, and it was much bigger. I actually made it first before I realized I would need to try a different pattern. Compared to commercially-available baby jackets, it was measuring around 6-9 months, even though it was the smallest size in the envelope!IMG-20170918-WA0004

Overall, the coats went well, although I wasn’t completely happy with the zippers or the hems, but for the first time making anything of the sort, I was pleased.

If all goes well, I will get to meet the little darling when her family brings her to visit the States this summer. And she might just have a stack of dresses waiting for her- if I can manage to squeeze them in while I study for boards 😉

See previous post for her receiving blanket (pink with llamas) that I mailed for her arrival along with some simple fleece blankets for swaddling (didn’t get photos of those), also in llamas. (Her mom and her uncle have a thing for llamas, so I play along…. =D  )

Maybe next weekend I’ll post some pictures of pieces I’ve promised extra photos of in the past, as well as a piece or two I’ve done for myself recently. Maybe even some flops lol! Not every creative endeavor ends well, and that’s ok =D

Go forth and be creative!

-J

The Minky Method

**Edit** I never thought this post would get so much attention after I shared in one of my social media sewing groups! I’m so happy to see comments from all of you who have tried out sewing with minky using my tips! Please enjoy and stay creative! -J


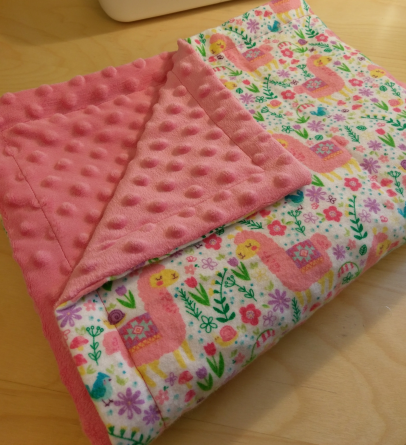
Since I’ve been in school and training now for…. way too many years, my friends have all started having kids. So what do I do? Learn to sew baby blankets, of course! I fell in love with the fun flannel prints and the ultra soft and whimsical “minky dot” fabric at JoAnn, so that’s where it all started. My methods have gotten better over the years, and when I recently posted a photo of a finished blanket headed to my sister-in-law and my first niece overseas, I got SO many questions about how to work with minky and how I made my blanket. So, with the next blanket, headed to a dear friend in Seattle, I decided to take photos of every step and document my methods so anyone can give it a whirl.

imag1132.jpg

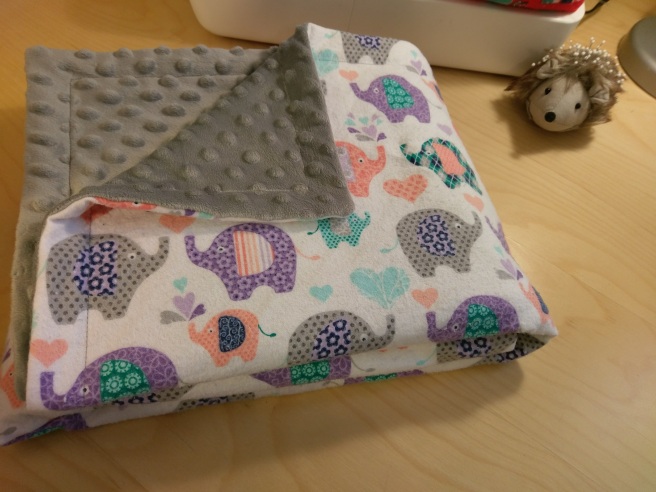
A note before starting: I choose to leave the two layers of my blankets loose with only a topstitch around the edge. I do not use batting between the layers or quilt them. My friends seem to like them the way I make them (my cousin’s son has carried his everywhere he goes for a solid 4 years now), and I’m not really sure that minky would take quilting very well because of how difficult it is to work with, so this is the method I stick to. Keep in mind, this is only what I have found works best for me. As always, your mileage may vary.

Enjoy!


Off camera- pre-wash and shrink your fabric. I tumble dry on low-medium to make sure the flannel shrinks up if it’s going to. If there are creases in the flannel, you can iron if you need to, but DO NOT IRON MINKY!!! It will melt and the dots will go away! Next, I square the flannel up and trim it to the size I want (here I did roughly 40″ x 40″, the “receiving” sized baby blanket) and finish the edges with my serger to make it more stable to work with. Next, the minky:

IMAG1133

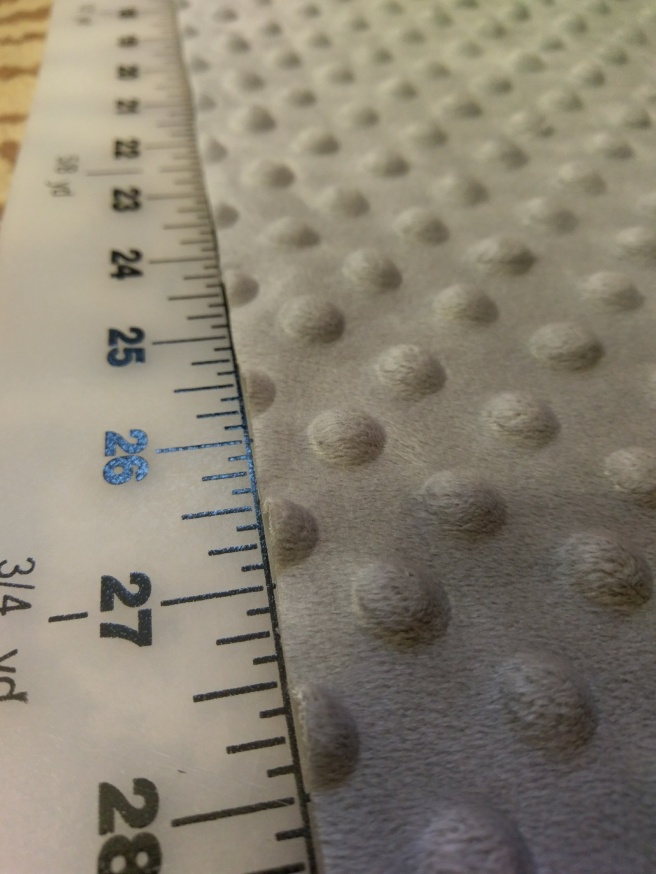
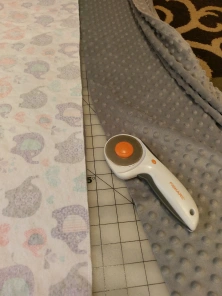
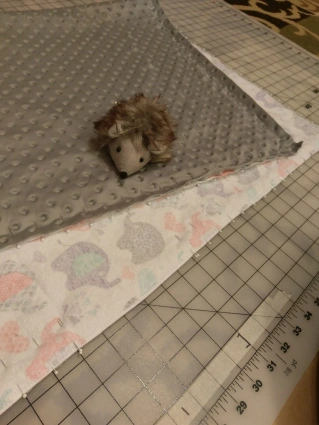
My secret weapon in the fight with minky fabric is a really really big cutting mat and a rotary cutter. It’s about 60 x 40″ on the floor of my sewing room. First, lay the minky out right side up on the mat and gently tug and smooth until there are no wrinkles, lining up the dots as best you can with a landmark like the bottom line on the mat. Trim the edge using the dots and the mat as a guide. If using scissors and no mat, use the dots as a guide and try to introduce as few wrinkles as possible while cutting, and re-adjust after each edge to keep it straight. Either way, it’s pretty much impossible to get it square without laying it out completely flat.

IMAG1134

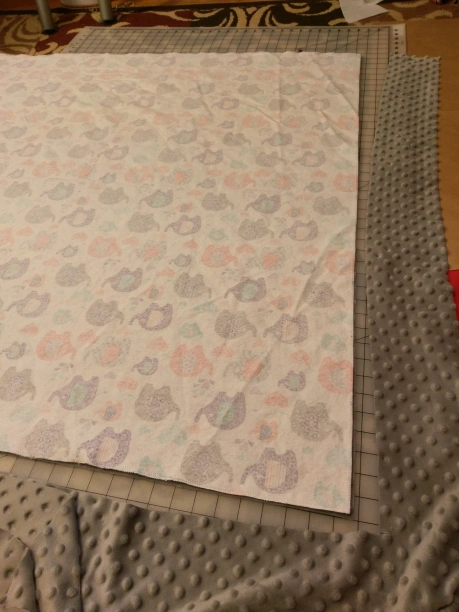
Next, lay your flannel on top, right side down (right sides together) and GENTLY make sure it is flat with no wrinkles, and without stretching or making wrinkles in the minky. Halfway through this process below- still a few wrinkles to smooth at the top. IMAG1136IMAG1137


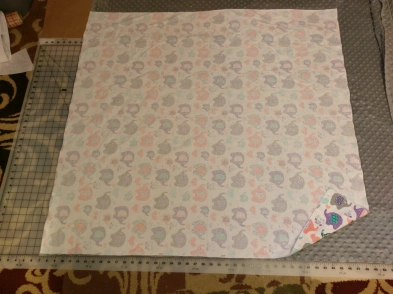
Cut around the flannel through the minky, following the dots as a guide if you think your flannel isn’t perfectly squared off, which can happen despite your best efforts!

IMAG1139

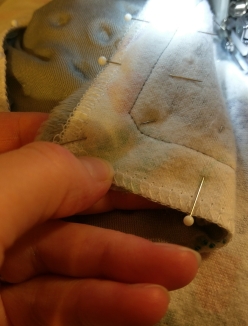
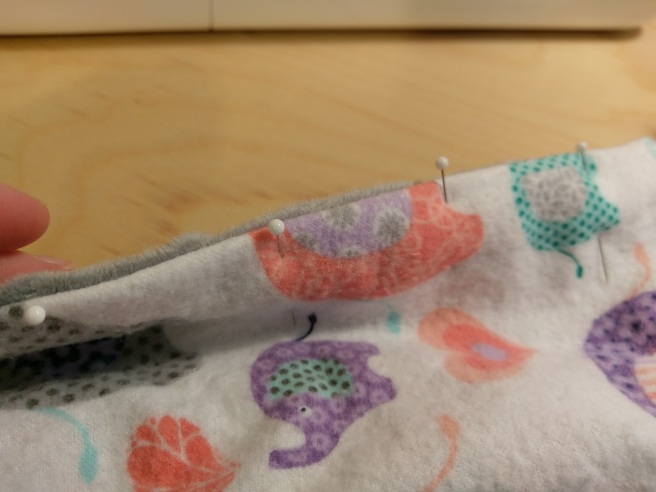
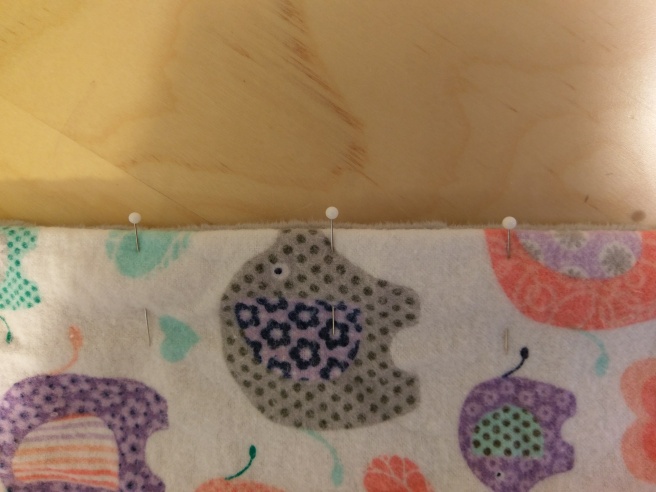
Next: pins, pins and more pins! I pin about every inch or so. You really can’t use too many pins. I like to start with the corners and middle of one side and divide each section in half with a pin, working my way out from the center halving the intervals as I go rather than starting at a corner and working my way straight up a side at 1″ intervals. For me, it keeps the side from bunching and stretching while I work.

IMAG1140IMAG1142

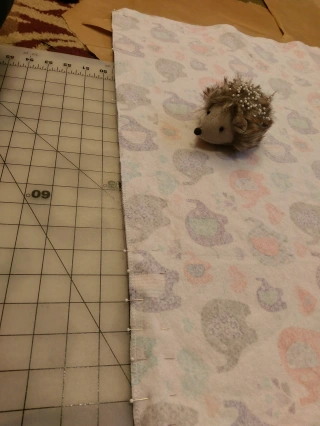
If you have to fold it over at any point while cutting or pinning to make it fit on your work space, be VERY careful not to introduce wrinkles between the layers. Don’t forget to leave a hole to turn it. I like to mark this with two pins so I don’t forget! 6″ was more than enough for this 40 x 40 blanket to fit through.

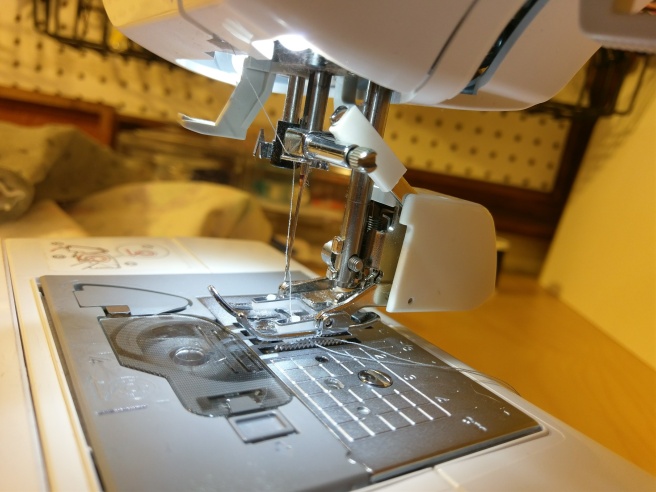
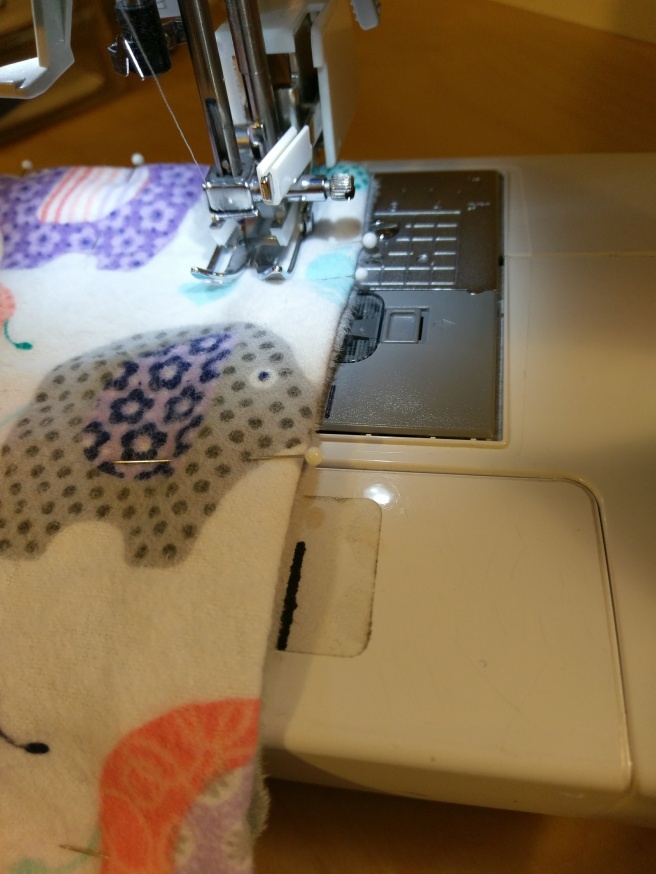
The next secret weapon is a walking foot. Here’s what it looks like if you’ve never used one. You will have to remove the ankle with your normal presser foot in order to attach it. The little lever sits on top of (or around, on some models) the bar that moves up and down while you sew. This drives a second set of feed dogs that interlock with your machine’s normal feed dogs. Instead of the bottom feed dogs gripping your fabric against the presser foot and sliding it backwards, the two sets of feed dogs grip from the top and the bottom and pick up and move the fabric without the sliding/pulling- this means that stretchy fabric will not be stretched out while sewing.

IMAG1143

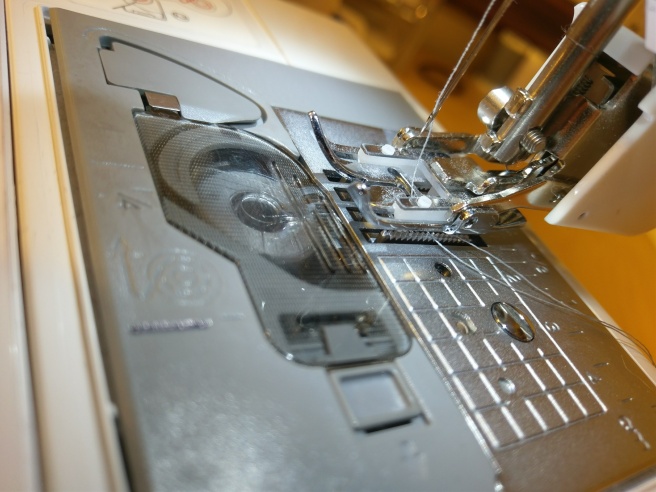
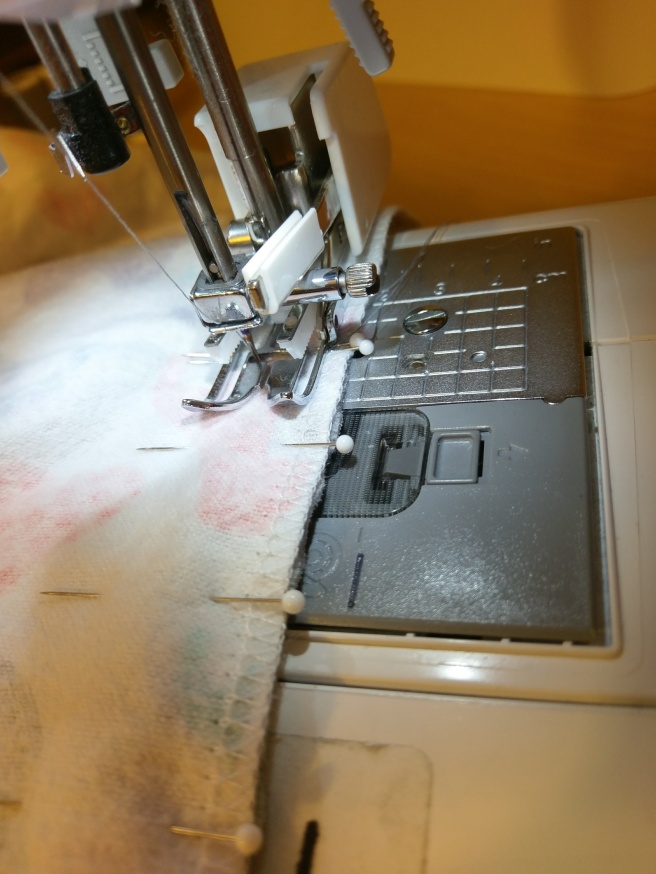
A closer look- you can see the second set of upper feed dogs in white plastic on my walking foot, positioned right over my machine’s lower feed dogs.

IMAG1144

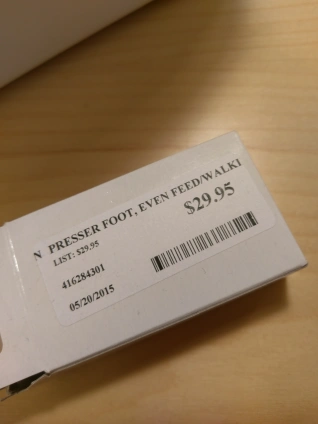
I highly recommend that you invest in a decent walking foot if you work with knits or minky with any frequency. You won’t regret it. My machine came with a walking foot, but it was poorly made, caught my fabric on a sharp piece of metal, and started malfunctioning after only a few uses. This (universal) one from the Husqvarna dealer at my local JoAnn has been a dream!

IMAG1145IMAG1146

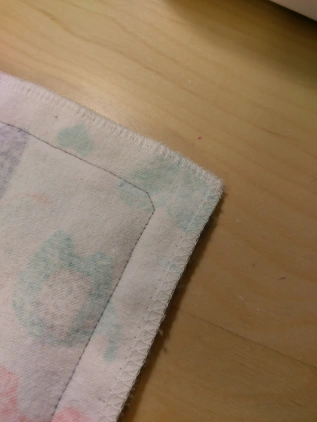
Sew the two sides together all the way around in one seam, starting at the opening you marked with two pins and stopping on the same side at the other end of the opening. I usually use a medium microtex needle, about an 80 or so. Here I used about 5/8″ seam allowances, but it really doesn’t matter as long as it is even. Before you pivot at the corners: see below for a trick for sharper corners.

IMAG1148

Minky trick #3 (you can use this elsewhere, too): at the corners, add a couple of stitches on the diagonal right at the tip of the corner. It’s counter intuitive, but it makes sharp corners later on. Trust me.

imag1150.jpgimag1152.jpg

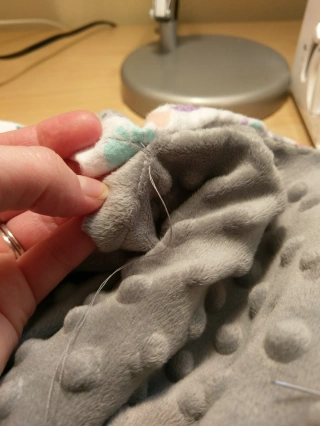
After finishing the main seam, if you want to make the slip-stitching easy on yourself, try this trick. It’s totally optional, but if your slip stitching gets as sloppy as mine, this really helps! Separate the layers and sew a guide-stitch through each layer separately. Make sure you use the same seam allowance that you just used on the rest of the blanket, and if your edges have become mis-aligned, then carefully account for this when you place your stitching in each separate layer.

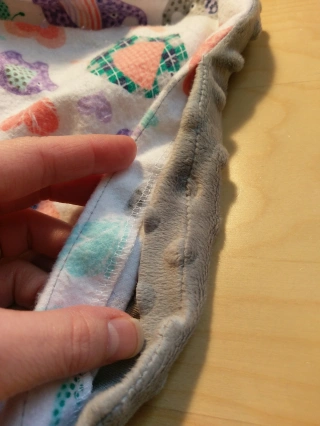
I’m separating the layers in the opening to start the flannel guide stitch- you can see the minky guide stitch on the left at the bottom of the photo. It doesn’t matter what order you do them in, but I have better photos of guide-stitching the flannel side:

IMAG1157

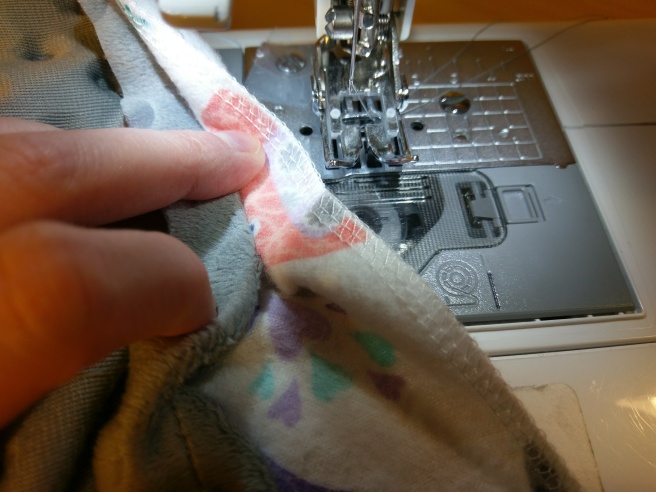
Fold the top layer back from the attachment point to get good exposure of the free flannel in the opening. IMAG1158

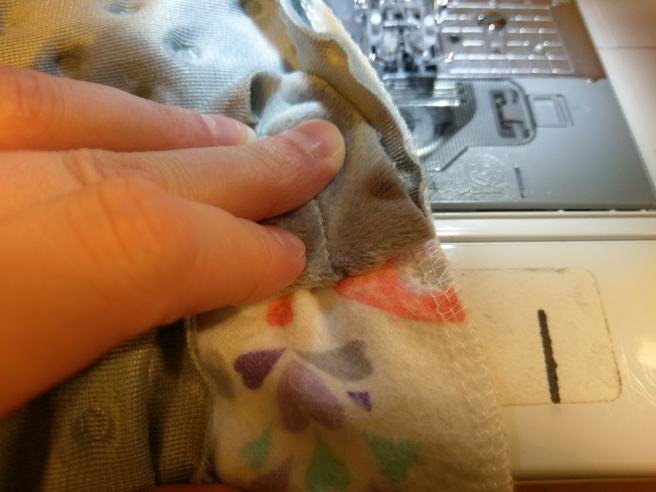
Place your needle as close to the point where the fabrics are joined, lining up your stitches with the previous seam, and sew through only one layer of fabric using the same amount of seam allowance. IMAG1159

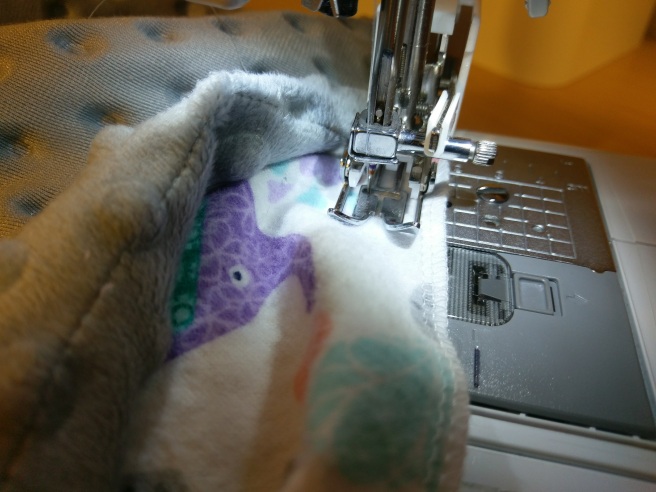
Stop short of your main seam, before you catch both layers of fabric, but your new stitching should line up with your previous seam almost exactly.  IMAG1160

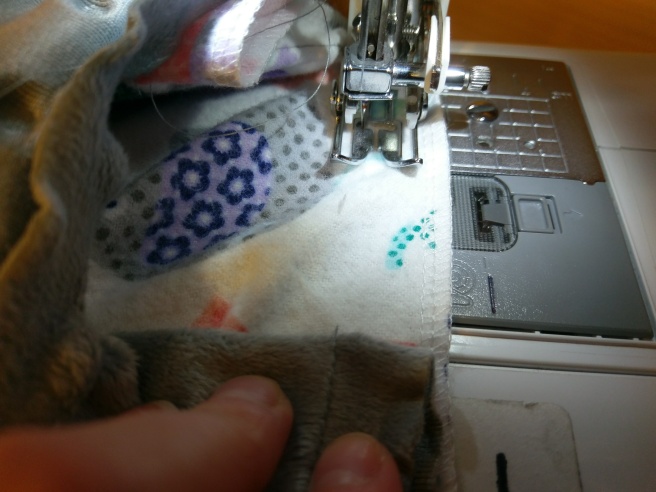
Repeat for the other side. You should end up with stitches in the opening, but not closing the opening, that you can use to align your slip stitches and keep them straight. IMAG1161

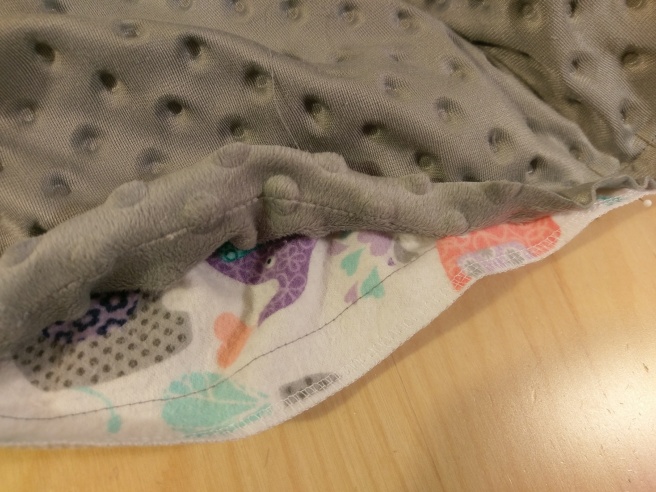
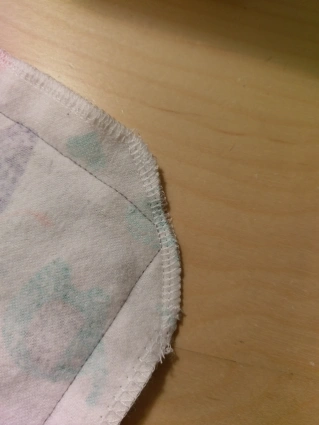
Now, back to those corners. You can either trim with scissors and zig-zag finish the free edge or, if you’re daring and you have good serging skills, you can just surge through the corner at an angle so that there is a very narrow margin between your seam and the serge, allowing the serger to cut away the excess.

IMAG1162IMAG1163

Using the opening, turn the blanket right side out and gently turn the corners with something pointed. The blunted, trimmed corner magically becomes sharp! Voila!IMAG1164

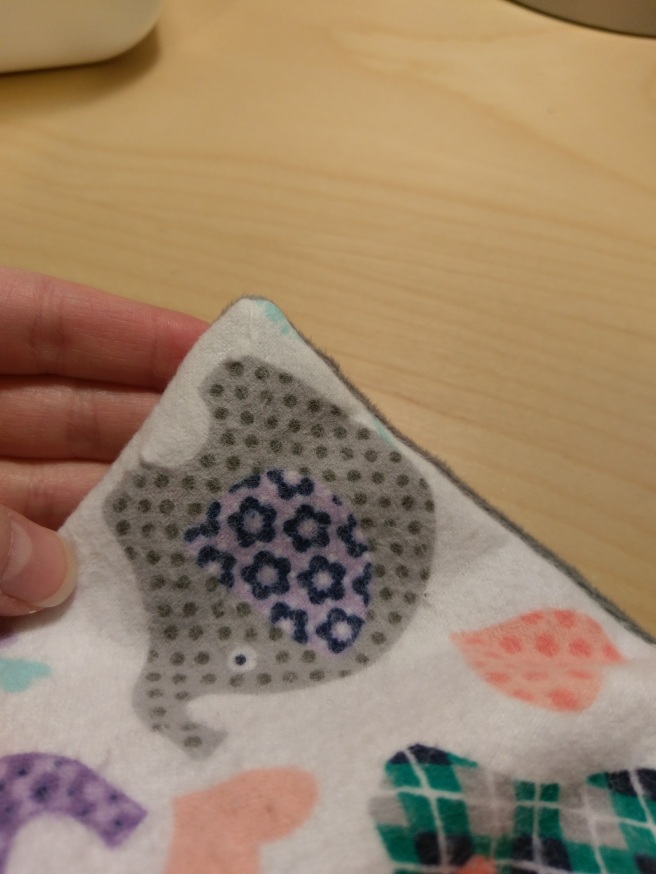
Now, fold in the edges of your opening and slip stitch that sucker closed. If you chose to add guide stitching, take your stitches slightly above your guide so that it remains tucked neatly inside your blanket. My slip-stitching improved 1000x the first time I did this. (On any other project, I might just iron a crease to follow, but since you can’t iron minky, this was my best solution!)

IMAG1174IMAG1175

Now for the topstitch. I’m not completely happy with my topstitching, but it’s passable. I think I need to use heavier thread and a topstitching needle, but for now, I use the same thread and needle I use on the rest of the project. I chose a 1″ seam allowance/border, but I’ve done more in the past. It just depends on what you like. I find 1″ is easy to manage. Before you start, wiggle the layers of fabric into place at the edge so that the seam is right on the edge and there’s no excess fabric on one side or the other. Pin about 2″ apart to keep the fabric from sliding, and topstitch. For perfect corners, stop short of the next side and use a ruler to measure exactly where to pivot.

IMAG1176IMAG1177IMAG1178

Tie off your threads and bury your tails in the border of the blanket and you’re done!

IMAG1179

Now, go forth and create!

-J

Back from a hiatus…

I’ve been taking a break from sewing while I focused on other things. I have done a couple of projects here and there, so I’ve decided to post photos now that I’m sewing again. Enjoy!

Most recent project: Rayon challis panel-print dress, spring 2017. This is nothing more than two rectangular panels with a partial side seam and a drawstring casing at the top. It was super easy and amazingly comfortable, and shows off the print beautifully! I have more of this fabric, so I will be experimenting with it more in the near future. Please disregard the laundry basket. The crop feature failed me just now… but everyone has these lying around the house, right?


This is a half circle with lots of gathering at the waist made from 60″ wide polyester print with full lining, sash, and elastic waist. I created this for my program’s graduation. More pictures of this later.

IMAG0552

I’ve been making bags lately- the inspiration was a partly that I bought a new bag and it was too small and partly that outdoor fabric was on sale and it sounded like a fun idea to make a bag in tropical banana leaves. The outer shell and top of the inner lining are outdoor canvas, which I’m hoping will weather the abuse I put my bags through better than my previous attempts (cotton home dec fabric) did. The rest of the lining and the inside zippered pocket are still cotton home décor fabric, though. I added a key keeper for fun. My mom liked mine so much that she asked me to make her one too, so after >16 photos of outdoor fabrics at JoAnn, she picked the red/orange/green foliage print and I documented all of my steps for her to follow along. =) Those are my two Brother machines photobombing in the background. Love those little guys!


This was a quick scrap-busting project: travel Kleenex covers! My mom used to make these so I had her send me a photo of one that she still carries with a ruler next to it. I devised my own pattern and then made about 10 of these one afternoon and gave them to my in-laws.

IMAG0426

Easter dress: my own wrap dress pattern in a mystery clearance polyester fabric (horrible to work with!!!!!) Fully lined, maxi-length, true wrap, cap sleeves.

IMAG0422


Cotton A-line maxi skirt with full lining and interfaced wide waist- I need a final photo of this. I made it around Valentine’s Day for a night out with my hubby and friends. Ironically, the day I wore it to work I found a blog entry online advertising Pellon interfacing by using it in a wide-waist skirt. Using the exact. same. fabric. Great minds, no? The first photo is of the scale miniature mock-up I did to try to maximize the hem circumference with the amount of fabric that I had using the slash-and-spread method for creating an A-line skirt. I somehow ended up mis-measuring my waist and cutting the waistband too small (!) You can see from the scale pattern that there was NOT much room for that error! I re-used the too-short waistband on the inside and narrowly found enough fabric to re-do the outside in the correct length. This was supposed to be an easy sew. It was not. Lesson learned: measure THREE times, cut once!


Curtain for a half-bath remodel. It was clearance red-tag home dec fabric and red-tags were half off. Hubby asked “…so did they PAY you to take it??” =P


Black lace-back cocktail dress with box-pleated skirt. I think this would have been better with a half or 3/4 circle skirt instead of the box pleats, but I still like it. The dress is in a poly satin and the sash/belt is a velvety textured ribbon- combined with the cotton/poly lace, I was going for a study in textures. The back lace piece was pre-made, from Amazon/China and was super cheap, but took months to arrive. I altered the shape of the lace at the top sides a bit to blend it with the shoulders of the dress. This took a lot of planning and prep work. I think I did several iterations of the bodice before I settled on a modification of my personal bodice pattern. Plunging necklines are difficult to get right, especially when fitting yourself.  I wore it to my department’s Holiday Party this past winter.


This dress has a story…

IMAG0186

My grandmother used to sew for herself and her four daughters. When it became clear this past summer that she would not be coming home from the nursing home to live independently and that she would soon need more income to pay for the nursing home, my mom and her sisters decided to clean out and sell her house per her wishes/with her blessing. During the clean-out, my mom found a ton of fabric and saved some for me since I like to sew so much. On inspection, this fabric was already pinned and cut for a size 20 dress. My grandmother passed away that winter, right after I had a chance to bring the fabric back to my home. I tracked down the pattern online and ordered a copy in (what I thought was) my size. Then, I practiced on broadcloth, tracked down a different size online (one-size pattern envelopes???) and tried again. Happy with the fit, I overlaid my size onto the pre-cut pieces and finished the dress that she had started. It was a fun process. I learned some new techniques in the process, and every time I pressed a seam my sewing room was filled with the scent of “grandma’s house”- the kind of familiar mustiness that is only pleasant to the person for which it triggers memories…

The dress is not my style. At. All. But it does have a certain 80’s-channeling-40’s charm. I’ve worn it to work and it’s had a good reception, so I’ll likely continue to wear it, if for no other reason than it reminds me of her =)


I did several projects surrounding my sister-in-law’s wedding. First, I made her a bridal shower gift of a self-drafted apron made from I Love Lucy fabric (the theme of the shower) with polka-dot ruffle and red bottom-weight cotton backing and ties. I used the leftover ILL fabric to line her card basket. Next, I inserted a side zipper into my form-fitting lace-back bridesmaids dress to save time/effort on the big day. I was the only bridesmaid at the church on time 😉 I also altered the flower girl’s dress. SO MUCH TULLE!!! She was so adorable! I also gave the bride the veil I wore at my ceremony after I blinged it out with sequined and beaded trim that I hand-sewed to the edge. The leftover trim was used to wrap over the ribbon on her bouquet. I enjoyed all of these projects so much!


Rayon sundress modeled after one of my favorite little knit pull-on dresses from college. This was finished this past fall and worn for my sister-in-law’s goodbye brunch, before she moved to Ireland with her new husband.


Final thoughts: the curl game is getting stronger. These days I’m using Suave Naturals coconut conditioner, Curls brand Crème Brule curl cream, Carol’s Daughter alcohol-free gel (soft hold) and my trusty long-sleeved T-shirt to plop for 5 minutes and no more. Recent insights- the curls reeeally do better if I do NOT touch them AT ALL after I take them out of the t-shirt. It’s so hard not to fuss and scrunch, but on the days that I take the t-shirt out, bobby pin and forget them, usually Saturdays, when I don’t care what they look like so I don’t try to “fix” them… ironically, they turn out AMAZING.

Have a creative day!

-J

The Envelope Clutch

An envelope clutch seems like an easy enough project, right? Wrong. Because, of course, I had to make it difficult for myself. I combined two different zippered pouch tutorials- one of them was actually for an envelope clutch, and then also included an inside zippered pocket. The fabric is clearance home decor fabric interfaced with Pellon 809 and lined with run-of-the-mill synthetic apparel lining. This is actually the second in this fabric (I used Pellon 71 F on the first one and it was definitely overkill, and it had other problems as well.)

Enjoy!

IMAG0855.jpgIMAG0856.jpgIMAG0858.jpg


Recent Sewing Projects

It has been a while since I have posted, but I have been doing projects in the meantime.

I have added a new “toy” to my collection: a serger! I’m getting better at using it each time, improving at making the seams balanced. Sometimes I use it to overlock the edges of my fabric pieces before constructing, other times I use it after construction to finish and reduce seam bulk. Rarely, I use it to actually construct a piece. I’ve even dabbled in rolled hems (more on that below). I’m still experimenting.

I modified my sloper to make a cross-front bodice pattern, then used it to make a true wrap design with a one-way stretch I found at Walmart. It is NOT the highest-quality fabric, but it is bold and pretty, and it was CHEAP!!! Good formula for an experiment. I am not thrilled about some of the seams, though. Despite using a walking foot, they puckered and warped in places. (Sorry about the poor-quality photo.) It is floor-length with an a-line silhouette and elbow sleeves. The v-neck bodice is self-lined, but the skirt and sleeves are not. I used my serger for some of the finishing, but not all. It was my first “real” project trying my serger and I wasn’t that confident yet.

IMAG0645.jpgIMG-20160723-WA0000.jpeg

Next, I used this same pattern to make another maxi wrap dress. This time, I used a very light-weight non-stretch fabric I found on clearance at Walmart (again, Walmart. who knew??) Since it was nearly sheer, I toyed with the idea of underlining, but eventually went with just a standard lining- fully lining the skirt as well this time, but attached to the dress at the waist. I used the serger for finishing again, with fewer mistakes this time. I also patterned, after MUCH research, indecision, misgivings and outside advice, a flutter sleeve. It turned out OK. Not fantastic, but OK. I tried a rolled hem for the first time with the serger and didn’t really like it. However, when making the contrasting scarf, I discovered why I didn’t like my first attempt at a rolled hem: I didn’t balance the stitch AT ALL and essentially, it was a crappy rolled hem. No wonder. When I (inadvertantly) balanced the stitch on the scarf, it was like a lightbulb went on in my head. OH! So THAT’s what a proper rolled hem looks like? That’s niiiiiiiiiiiiice. =)

That’s my “puppy” Bentley in the second photo. Sometimes he “helps” me sew =)

IMAG0686.jpgIMAG0679.jpg

I also self-drafted and made a gift for my SIL, of which I am ridiculously proud, but I can’t post pictures of that until after she receives it 😉

Finally, I found more rayon on clearance at JoAnn and attempted to copy one of my favorite little casual knit dresses (from college??). I tried a new skill: making and using binding to finish the neckline and armscyes. It went swimmingly. Then, I gathered the skirt to the crossover top and gathered the top slightly to fit my chest. That did not go well. I took a shortcut with the gathering that the fabric did NOT tolerate. After I ripped it out and did it right, it turned out much better. Lesson learned. Again, sorry about the photo quality.IMAG0830.jpg

That’s all for now. More after my SIL’s bridal shower, most likely.

-J

Casual Tropical Dress… and other recent projects

I have some sort of soft, flowy fabric that wears like a dream. (UPDATE: it’s rayon! who knew!) But working with it is like herding cats; it completely has a mind of its own. Nonetheless, cats were herded and I managed to make a pull-on maxi dress with an elastic waist out of a non-stretch woven fabric. It’s comfy and fun. I used a rolled hem to finish all the edges and (surprise!) the hem… which is good practice for my bridesmaid dress for my SIL’s wedding, which will likely need a rolled hem. It would be annoying to have to pay someone to hem a dress for me, so I decided to get some practice in now before it arrives!

Below are photos of today’s dress and another that I made recently after several weekends of drafting. Enjoy!

(on a related note, I think my bobbin tension might need to be adjusted, but I’m afraid to touch it because the last time I adjusted the bobbin tension it took months to get it back to normal again!)

Sauce master

So, everyone in our little family of three (two humans and one dog) has “specialties”. For example, Bentley’s are “seat stealing” and “being in the way”. Two of mine are “good ideas” and “sauces”.

I’ve been taking a sewing hiatus until I get the shelves and storage things up above my sewing tables (pictures soon!) so I’ve been creatively cooking recently. Mostly because I’ve put myself on an elimination diet to try to calm my crazy GI system (it has helped somewhat, I think). But also just because I like to cook. So, I decided to go back to something I used to enjoy, but haven’t tried in a while: white wine sauces. Enter 187 mL bottles of white wine and I’m a happy cooking camper. I started experimenting with moscato (I know, kind of sweet for a sauce, but roll with me) a white roux, cream, and the drippings from whatever protein I had made. It worked well. The hubby liked it. Then I decided to add fresh basil and lemon. Even better. Then I switched to sauvignon blanc. Perfection. So I served it to some old friends yesterday for lunch. They’ve never said anything bad about my cooking, in fact, I’ve never heard them say anything bad about anything, but they did both practically lick the plates clean. So I’ll take that as a success. I’m writing it down here as much for myself as anyone else. Feel free to try it out.

Melt 1T butter and add 1 T flour over low heat, simmer a few minutes to make a white roux before adding cream and simmer a bit more, all while cooking protein in another pan. After removing protein from second pan, deglaze with white wine and simmer for a couple of minutes. Add roux/cream mixture to the simmering wine. Season and simmer until the desired consistency is reached. Add back in your protein and simmer, or spoon over protein on serving plates.

tcp

I’m back!

I’m done with my most recent round of boards, so now I can be creative again. (Don’t ask. I won’t know until May if I passed. It’s a long story…)

Since I have a ton of work piled up from when I had studying blinders on, I can’t do all the projects I want right now, but I’m planning them for some slow weekend very soon. My next project will be copying a ready-to-wear dress that I bought this past weekend. I have a ream of tissue paper and some extra broadcloth all ready for the task.

In the meantime, an observation.
Now that I have embraced my curls, looking at photos of me in the past where I tried to wear my hair natural/wavy/curly is painful. I have a slideshow app on my desktop that shows me photos of my husband and I while we were dating and a photo that I used to love flashed across the little box. Three thoughts occurred to me.

  1. OHMYGOODNESS WHAT DID I DO TO MY HAIR? ugh.
  2. Look at that handsome young man! Oh, yes. That would be my hubby =)
  3. Is this what middle-aged people think about their hair when they see photos of themselves from the 80’s now?

-J